Many people own the DeWalt DW735 planer, a reliable and efficient tool that makes woodworking jobs easier. One common maintenance task for this tool is changing the drive belt. This task may seem complex, but with the right steps and tools, you can easily do it yourself. This guide will walk you through the process.
So, let’s roll up our sleeves and get ready to give your DeWalt DW735 planer a new lease of life.
Tools & Materials Needed
Before we begin, gather all the necessary tools and materials. You’ll need:

- A new drive belt for the DeWalt DW735 planer
- An Allen wrench
- A Phillips screwdriver
- A Torx driver
- A utility knife (only if the old belt is damaged)
It’s wise to keep your tools organized and within easy reach. This not only speeds up the job but also makes it safer and more enjoyable.
Safety Precautions
Safety comes first when using tools like a planer. Always unplug it before you start so it doesn’t accidentally turn on and hurt you. Wear safety glasses to keep dust and small pieces out of your eyes.
Keep your workspace clean and bright because a messy or dark space can cause accidents. Be careful with the blades and other sharp parts to avoid cuts. Don’t rush—go slowly and follow the steps carefully. No project is more important than your safety, so always take the right precautions.
5 Easy Steps For Changing Dw735 DeWalt Planer Belt
Step 1: Preparing The Planer
Let’s get started by getting the planer ready to change the belt. First, unplug the planer to make sure it won’t accidentally turn on while you’re working. Clear the area around the planer so you have plenty of space to work safely and comfortably.
Wipe off any dust or debris from the planer so you can see the parts clearly and make the job easier. Taking these simple steps will help ensure a smooth and safe belt replacement process.
Step 2: Removing Covers & Components
Alright, let’s move to the next phase. Now we need to remove a few covers and components to gain access to the drive belt. It’s like a bit of a puzzle, but you’ve got this! Here’s what you need to do:
- Start by removing the top cover of your planer. It’s like opening the hood of a car; it gives you direct access to the drive belt.
- Next, take off the dust chute. This part usually blocks your access to the belt, so it’s best to get it out of the way.
- Then, remove the thickness adjusting wheel. It’s located near the drive belt, so removing it will give you more space to do your work.
- Depending on your machine, you might need to remove more covers or components. If that’s the case, use your Allen wrench, Phillips screwdriver, or Torx driver to loosen and remove the necessary screws and bolts.
Remember, it’s crucial to keep track of all the parts and screws you remove. You’ll need to put them back in their correct places later on, so maybe lay them out on a piece of cloth or in a tray in the order you took them off.
Step 3: Removing The Old Belt
Great work so far! Now let’s take off the old belt. Here’s what to do: If the belt is still in one piece, gently pull it off the pulleys while turning it, like you would with a bike chain.

Be careful and don’t force it, so you don’t damage the pulleys. If the belt is broken or damaged, you’ll need to cut it off. Use a utility knife, but be very careful. Make sure you only cut the belt, not the pulleys or your fingers.
Nice job! With the old belt off, you’re ready to put on the new one. You’re already halfway there—keep it up!
Step 4: Installing The New Belt
With the old belt removed, it’s time to install the new one. This is the heart of our task, but don’t worry. We’re here to guide you through it.
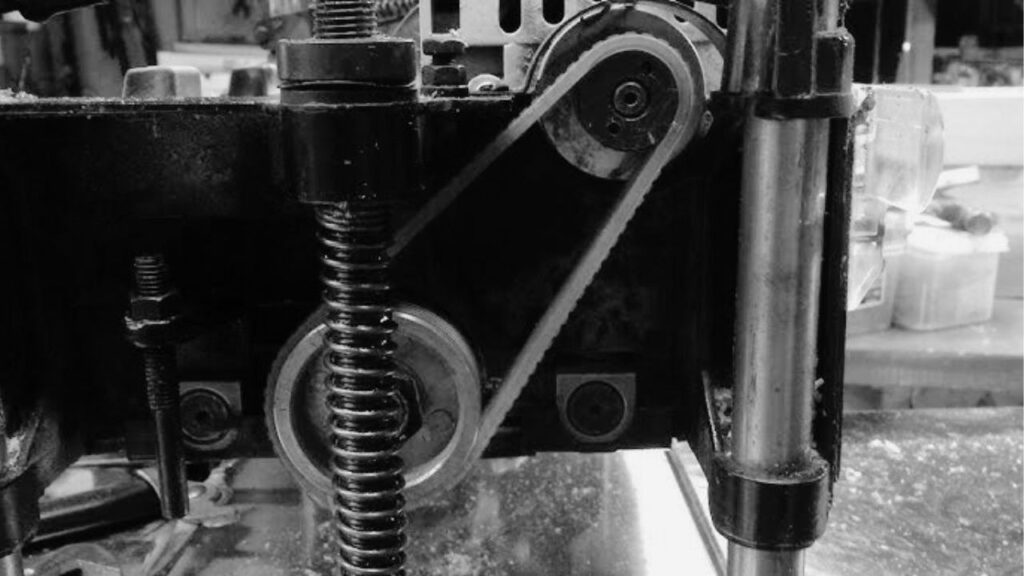
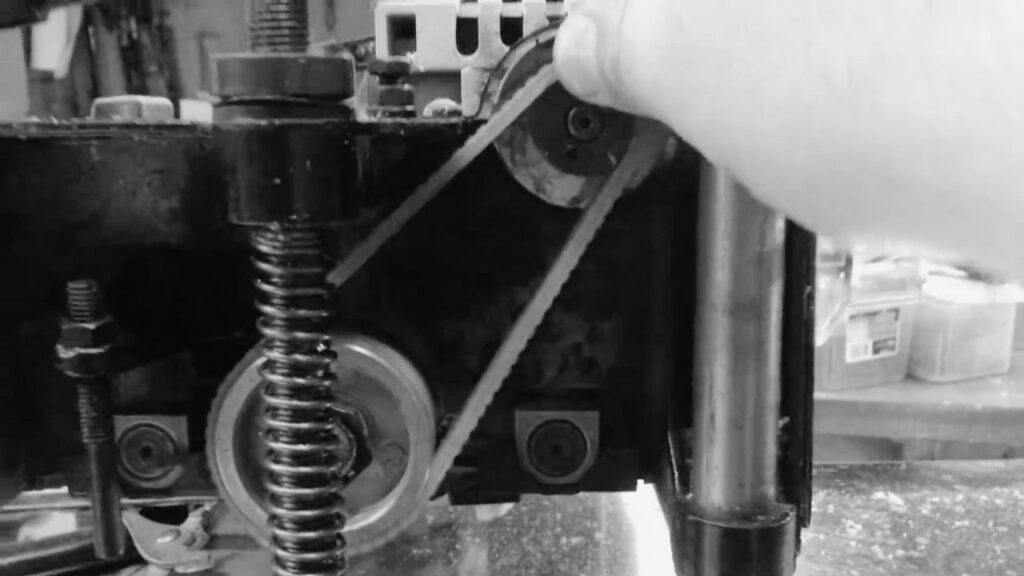
- Take your new drive belt and place about half of it around the upper pulley. It’s a bit like putting a bicycle chain back onto its gears.
- Next, you’re going to twist and push the belt through the small gap between the adjustment rod and the cutter head pulley. This might be a little tricky, but be patient.
- Here’s a tip: Use a screwdriver to carefully pry the belt behind the adjustment rod. Be careful not to damage the threads or the pulley. We want to fix our planer, not create new problems.
- Once the belt is partially on the pulley, start rotating both pulleys. At the same time, push the belt to slowly work it onto each pulley.
- Make sure the belt is sitting in all the grooves correctly. Think of it as aligning a car tire on a road – it needs to be just right for a smooth ride.
Congratulations! You’ve successfully installed the new belt. But we’re not done yet. Let’s move on to the next step.
Step 5: Reassembling The Planer
Now that the new belt is in place, it’s time to put our planer back together. This is like solving a puzzle, but you’ve already done the hard part. So, let’s do this.
- Start by reinstalling all the components and covers you removed earlier. Remember, we’re doing this in reverse order.
- Ensure everything is securely fastened with the appropriate screws and bolts. We don’t want anything loose when we start up our planer.
Great job! Your thickness planer is now back in one piece. But before we get back to planing, there’s one final check we need to do.
Final Check
After all your hard work, it’s time to do a quick check to make sure everything is ready. First, make sure all the covers are put back on properly, so nothing falls off when you turn the planer on.
Next, check that the belt is correctly placed on the pulleys, just like you set it up during installation. Finally, clean out any dust or debris inside the planer to help it run smoothly. And that’s it! You’ve successfully changed the drive belt on your DeWalt DW735 planer.
You should feel proud of yourself—this is a great accomplishment. Now, with the new belt in place, your planer is ready to go, and you can get back to your woodworking projects. Happy planing!